Monday, January 31, 2011

Excitement in the Air

I'm reposting this. It has approximations of all of my 30 for 30 items plus some accessories. All outfit suggestions definitely welcome.


Get your own Mini Editor from Polyvore


Let the Madness Begin

All Items 30 for 30

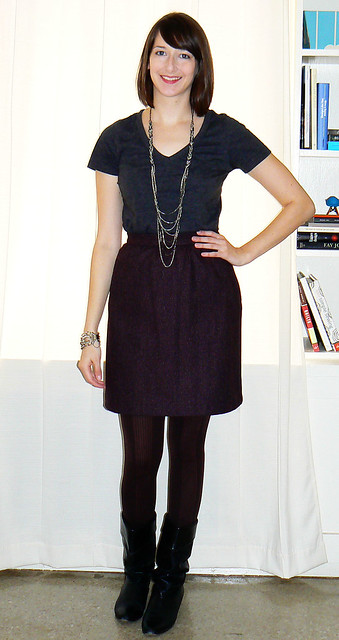
The results are in: my final choices for the next round of 30 for 30. As an extra challenge, I tried to pick 30 different items than the first time around. I only have 4 repeats, my skinny black pants and three pairs of shoes.


Blazers

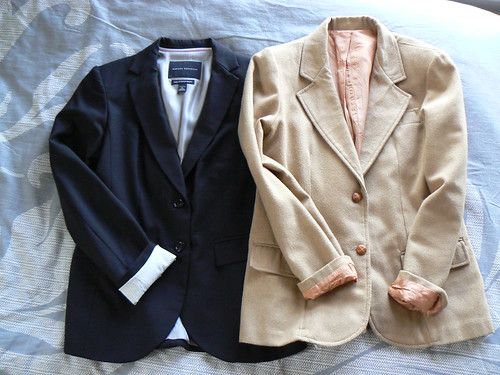
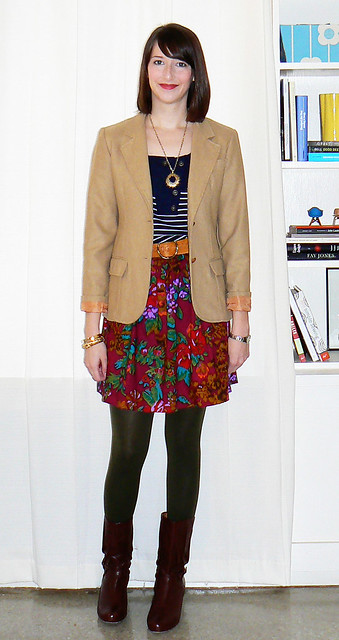
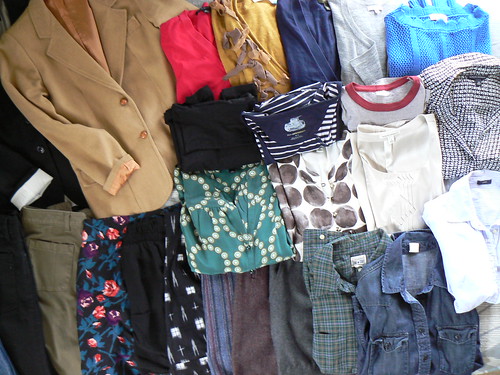
2 Blazers - Black (Banana Republic), Camel (Vintage, Thrifted)


Sweaters

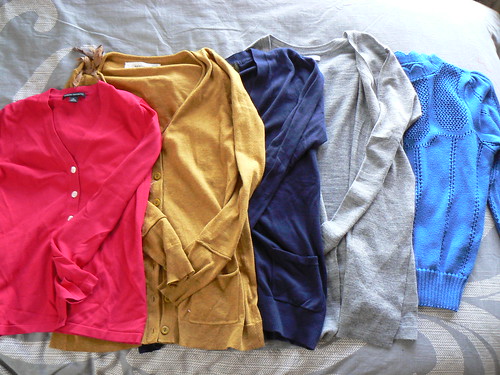
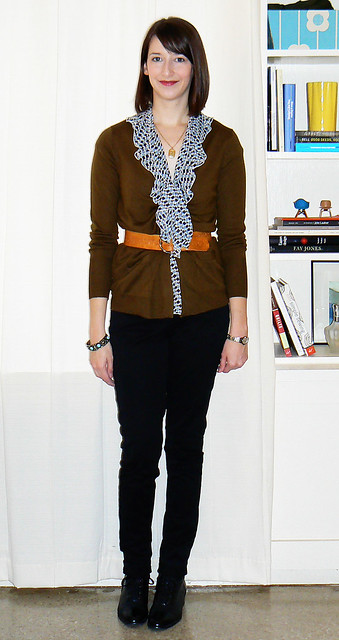
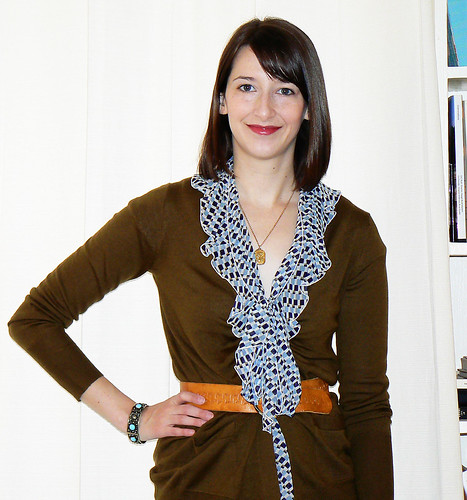
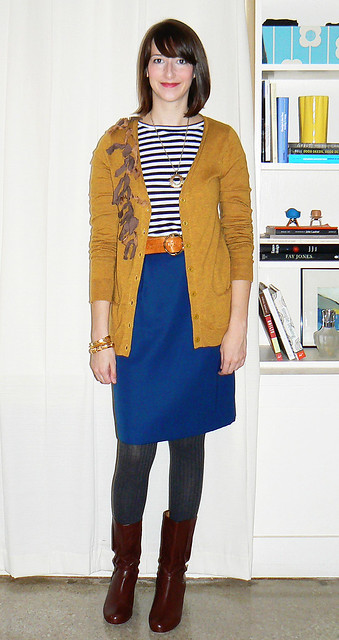
5 Sweaters - Fuchsia (Banana), Mustard (Anthro), Navy (Eddie Bauer), Grey (Gap), Blue (Vintage, Thrifted)


Button Ups

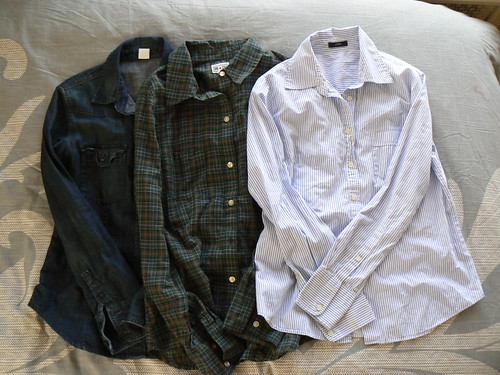
3 Button-Ups - Denim (J.Crew), Plaid (Converse), Striped (J.Crew) All from Plato's Closet


Blouses

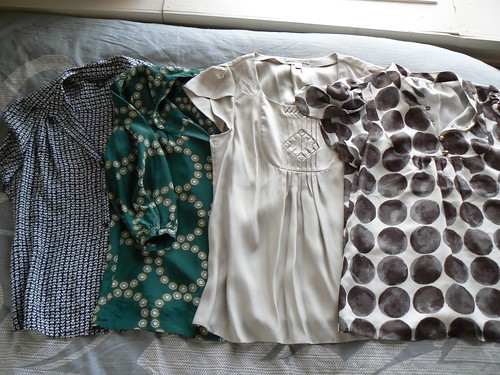
4 Blouses - All Banana Republic


Tees

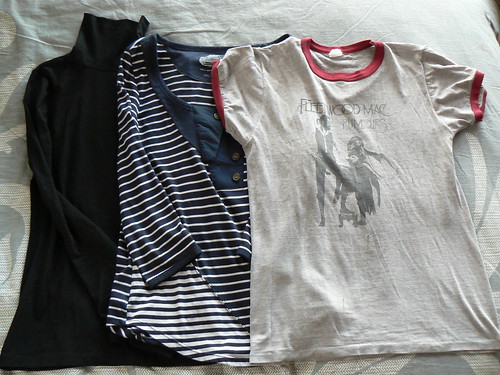
3 Tees - Turtleneck (Target), Striped (Anthro), Original Fleetwood Mac (Vintage, Mom'd)


Skirts

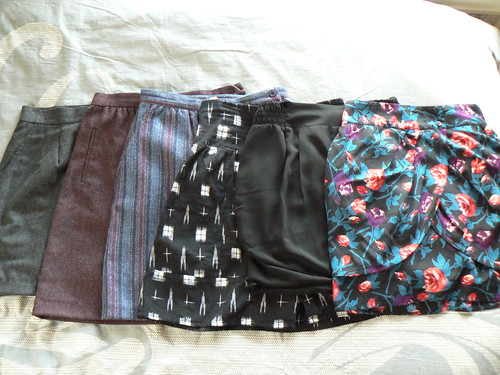
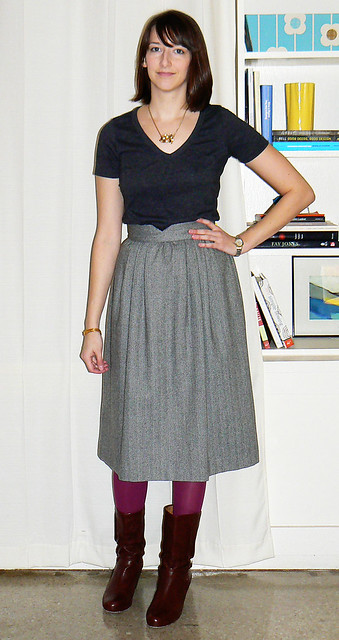
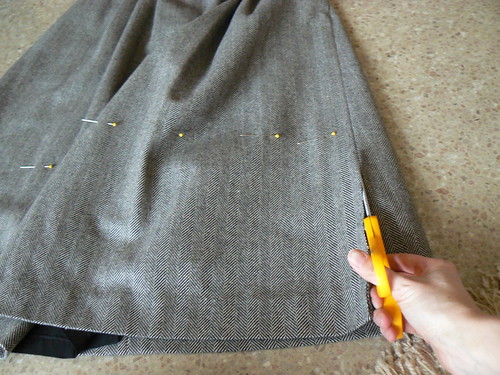
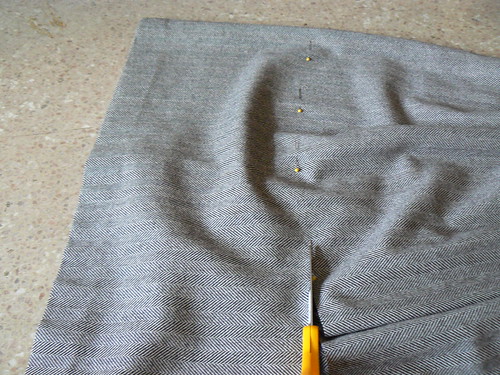
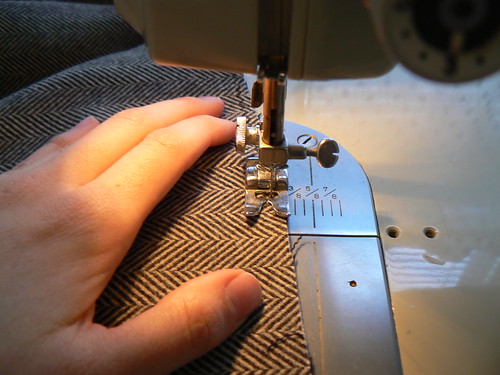
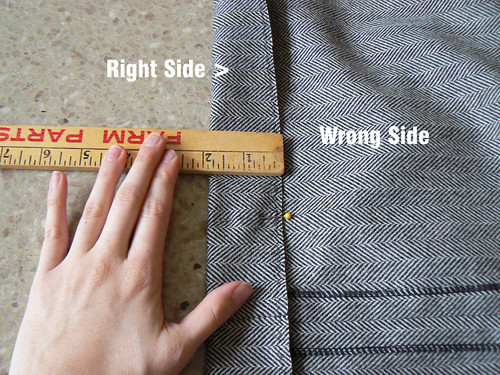
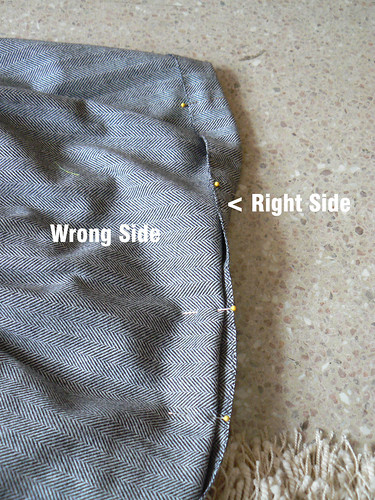
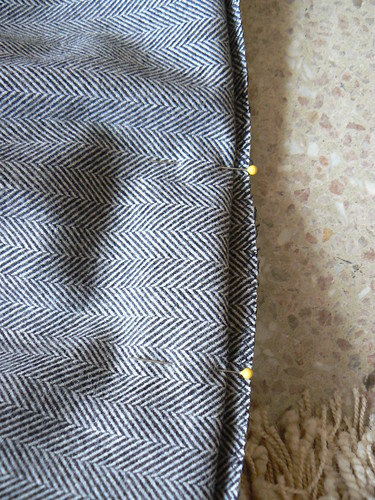
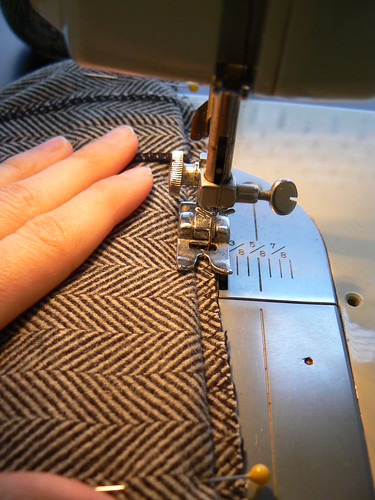
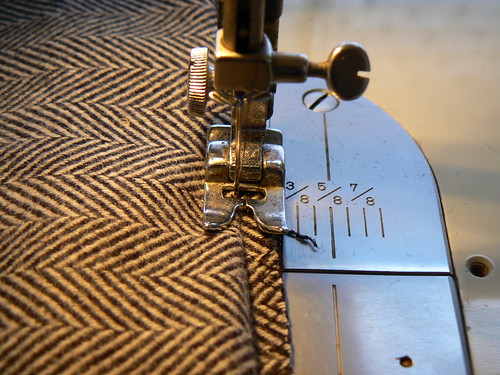
Skirt - 1-3 (Vintage, Thrifted, Altered), 4-6 (Urban Outfitters)


Pants

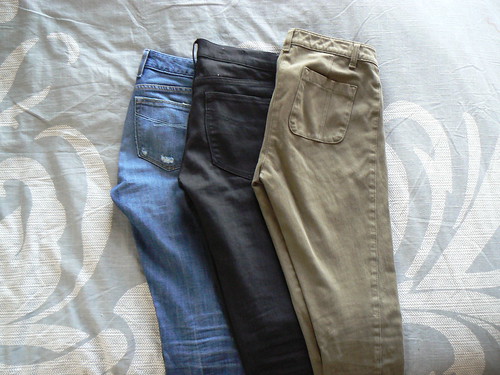
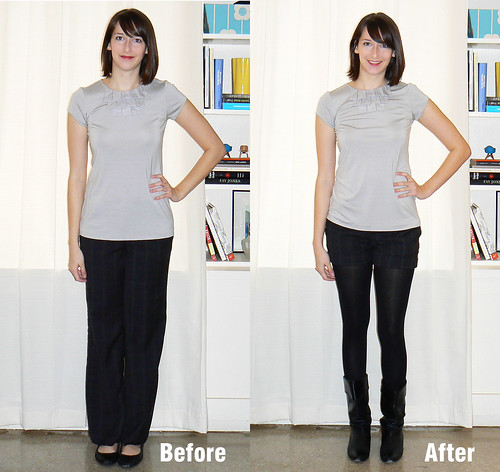
3 Pants - Jeans (Gap), Black (Gap), Olive (J.Crew)


Shoes

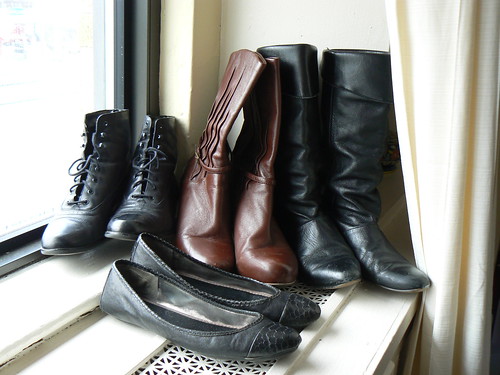
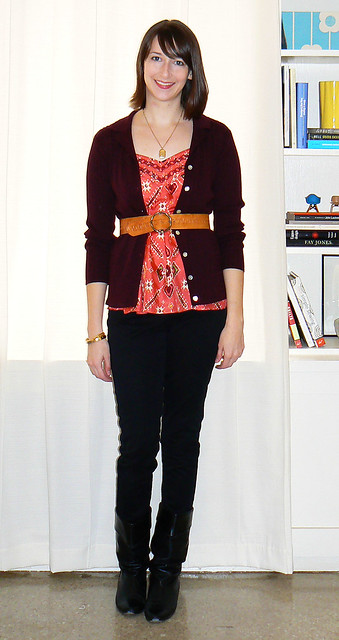
4 Shoes -Flats (Banana), Boots L to R (Thrifted, Frye, Thrifted)

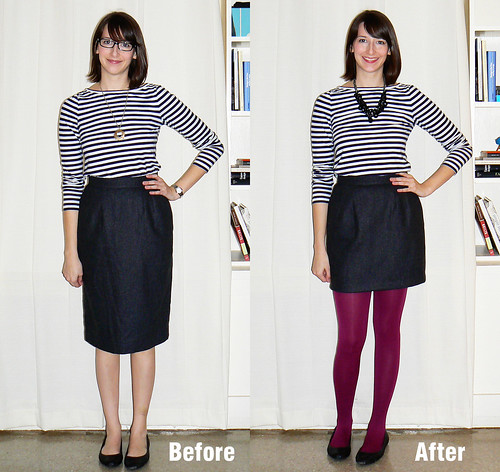
I did apply my "lessons learned" from last time, to my picks for this time. I picked extra neutral toppers, no dresses, and pants in three distinct colors (still all skinny though, old habits die hard).

Thursday, January 27, 2011

Make New Friends, But Keep the Old

Okay, so I was never a Girl Scout, but that doesn't mean I can't learn lessons from their campfire songs. Today's outfit is a combo of new and old (as far as the world of fashion goes). The cardi was purchased the day my parents came to town and the belt and boots are from my lastest thrift expedition (one I didn't blog about). The top however is the one I wore on my first day of teaching, nearly two years ago. The really old is the jewelry. The locket and bracelet both belonged to my Great Aunt, from the 50s perhaps.

I think that a mix of eras and styles make the best outfits (and interior decor for that matter). An outfit that comes entirely from one store, directly off the mannequin, doesn't show an individual's creativity, perhaps only that of the store they purchased it from. The main point you should get from today's lecture, students, is that a creative outfit involves pieces from a variety of sources and time periods. In architecture, a building with a mix of periods and styles is called a pastiche, but in fashion it's called just plain fun.


Outfit 01.27.11

Cardi - J.Crew
Blouse - Banana Republic
Pants - Banana Republic
Belt and Boots - Thrifted
Jewelry - Vintage


Outfit 01.27.11 Detail

Wednesday, January 26, 2011

Business Attire

I had an interview today. I don't want to say too much until I hear back from them. I wore one of my skirts from the last 30 for 30 challenge. It was one of the first skirts that I hemmed myself (versus paying $10+ for the seamstress to do it). That was the end of October. It just proves that it doesn't take a lot of time to develop your skirt hemming skills (or photography skills for that matter, check out those early photos, whew!).


Outfit 01.26.11


Blazer - Vintage, Thrifted
Stripe Tee - Anthropologie
Skirt - Thrifted, Altered
Tights - Hue
Boots - Frye
Accessories - Vintage

Tuesday, January 25, 2011

Yet Another Before and After

Let me know if y'all are getting tired of these before and afters. I think this is the last skirt in the "alter" pile for now. I wanted to go ahead and get it finished because it's one of my picks for the next round of 30 for 30.


Skirt Before and After

Skirt - Anne Klein (Goodwill, $4.00)


Source: jcrew.com via Kara on Pinterest


I was inspired by this J.Crew skirt and hemmed it a bit shorter than I normally would.

High Horses and Sore Heads

I've done really well all month with my NNNY challenge, until Sunday. My parents came to town, and we went shopping. At Anthropologie. Let's just say that I fell off that high horse I've been riding faster than you can say "sale rack" and hit my head on my soap box on the way down. In my defense, my parents were buying and I got some things for my interview tomorrow. More on that later.


Outfit 01.25.11

Cardigan - Anthropologie
Breton Tee - Rodarte for Target
Skirt - Vintage, Thrifted, Altered
Tights - Eddie Bauer
Boots - Frye
All Accessories - Vintage


Outfit 01.25.11 Detail


I
'm wearing stripes today as a part of Everybody, Everywear. Head over there to check out everyone else's versions.


Sunday, January 23, 2011

Call to Arms for Wardrobe Freedom

Something Liz wrote about a couple of weeks ago really struck a chord with me. She wrote about trophy pieces, those pieces that you wear once for a special occasion, then proceed to hang up and never wear again. Liz's goal of putting these pieces to better use has inspired me to do the same with the trophy pieces in my wardrobe.

While this tank is not necessarily a trophy piece (I've worn it more than once), I have always relegated it to summer time with a white mini skirt. I've literally had this top for three years and that is the only way/time, I've ever worn it. Why limit this beautiful top to one kind of outfit in one season? The sherbety color might seem to suggest summer, but layered with a jewel tone cardigan and a tough belt, it definitely can work for winter.

When you limit how and when you wear an item of clothing, you are really limiting your wardrobe options. When I say these are summer clothes and those are winter clothes, I automatically reduce my options by 50%. Without these crazy arbitrary rules, your wardrobe seems much more plentiful. Let's all make a new rule for ourselves, all the items in our closet are fair game, all the time. After all we're the ones who bought them in the first place, we should be able to wear them any time we want, in any way we want.


Outfit 01.23.11
Cardigan - Thrifted
Tank - Anthropologie
Pants - Banana Republic
Boots - Vintage, Thrifted
Necklace - Vintage, Great Aunt's
Bracelets - Vintage
Belt - Thrifted

Another Before and After

Another before and after for you. I'm on a roll.

Ever since the last 30 for 30, I've been wanting to try out the whole shorts and tights trend. I was never able to find any winter shorts I liked last year. Since I've been doing "Nothing New in the New Year", I've been on the lookout for some that I could thrift. I've also been looking for wool pants that I could cut off. I've had zero luck so far, but I finally hit the jackpot.

On my expedition yesterday, I decided to stop at a thrift store that I rarely shop, because they had 50% off the entire store. I found the perfect pants to cut off, wool J.Crew for $2.00. They looked decent as is, but I didn't feel bad cutting them off, because someone had hemmed them previously and had done a total hack job.

Before and After Shorts

Snip, snip. Hem, hem. Cuff, cuff. New shorts!


Edit: If you want my actual length equation, here it is.


Length that you want + (2 x desired width of cuff) + 1 inch

I can give more detail instructions if anyone would like them.

Saturday, January 22, 2011

The Promised Skirt Hemming Tutorial

1 Before
Step 1. Choose a good skirt to work with. This particular technique works best with wool-like skirts. If this is your first time for hemming a skirt, look for one that is unlined and straighter vs. fuller. The less material, the easier it will be to work with. Also look at the existing hem. If it is a blind hem, then you know that a shorter length with a blind hem will work well. Don't forget to take your before photo!


2 Measure
Step 2. Try on the skirt and mark the length that you would like it to be with a straight pin. You could also measure off of a skirt you already own that you know will be a good length. I usually shoot for finger-tip length, then I know it will be appropriate for school. If this is your first time shortening a skirt, I would aim for the conservative side. You can always go shorter later, but you can't add length back on.


3. Length
Step 3. Take off the skirt and measure down to the hem to get the length that you need to remove. In my case, it is 11.25 inches


4. Hem
Step 4. Measure the existing hem to know what length to make the new hem. These types of skirts generally have a hem that is around 1.5 inches. My was 1.75.


5. New Length
Step 5. Subtract the length of the hem from the length that needs to be removed. In my case, 11.25 - 1.75 = 9.5. Put a new pin at this new length.


6 Pin Across
Step 6. Measure at several places across the skirt putting a pin at the new length. I can usually get away with 5 pins across the front. First-timers might want to use a few more. You don't want to cut the skirt straight across. Most skirt hems curve slightly.


7 Cut Seam
Step 7. Cut up the side seam to the pins.


8 Cut Across
Step 8. Start cutting across the front of the skirt. Getting as close as possible to the pins. Repeat the pinning and cutting process on the back.


9 Zig Zag
Step 9. Make a zig-zag stitch all the way around the bottom of the skirt. This will keep the fabric from fraying.


10 Pin Hem
Step 10. Fold the edge over to make the hem using the measurement from earlier. Pin all the way around.


11 Pin for Bling
Step 11. Now the tricky part, folding it properly for the blind hem. Lay the skirt with the wrong side facing up. Fold the hem underneath so that there is 1/4 inch of the edge exposed. Repin.


12 Pin for Blind
Your final folding should look like this. The wrong side of fabric facing up, the hem folded underneath, and aproximately 1/4 inch of the edge exposed.


13 Blind Hem
Step 12. Set sewing machine to blind hem (check instruction book for setting). Your skirt should be laying wrong side up with the the 1/4 inch exposed edge facing the inside of the machine. The actual blind stitch will vary between machines. Mine does two straight stitches on the exposed edge and then one stitch through the folded fabric.


14 Blind Hem
The key to getting a good blind hem is to barely catch the edge of the folded fabric. I'm talking millimeters. This is the stitch that will be visible on the front. You want it to be as close to the edge of the fold as possible, therefore, small as possible. If your stitch is too far to the left of that fold, you will have a large visible stitch on the front and the hem will not lay flat. If you have never done a blind hem, I recommend practicing with a scrap of fabric, perhaps the one you cut off the bottom of the skirt. It is also a good idea to sew painfully slow when you are first learning to blind hem. Be slow and methodical, but don't sweat it. If it's messed up, you can also rip the hem out and try again.


15 After

Step 13. Once you've sewn a blind hem all the way around, be sure to iron your new hem. It will be a nice finishing touch. Finally, take your after photo and show off your handiwork to all your friends.

All right, that's it. My first tutorial. Hopefully I was clear enough in all my instructions. If you have any questions, be sure to let me know.

Edit: If you hem a skirt using this tutorial, be sure to let me know. I want to see photos!

Friday, January 21, 2011

Before and After

Below is the before and after for the $2.00 wool skirt I bought the other day at Goodwill. I've got shortening a skirt down to a science. On a skirt without lining, I can do a blind hem in under 30 minutes. I've been thinking about doing a tutorial on how to quickly shorten a skirt. Would anyone be interested?


Maroon Skirt Before

In true before and after fashion, I have a weird look on my face and my hair is looking sort of gross.


Maroon Skirt After


Look what a difference 6 inches, a shower, and some accessories can make.

ShareThis

Related Posts Plugin for WordPress, Blogger...

Disqus for Unusual Form